
Your GoPro camera is great at capturing action videos. Whether you’re snowboarding, skateboarding, or snorkeling, the lightweight camera produces stunningly clear videos. Despite the fact that GoPro’s aren’t made for security purposes, there are still a lot of people who wonder how to go about using them in this way.
To turn your GoPro into a security camera, you need three pieces of equipment: a USB cable, an extension cord, and a tripod to capture angles. Then you can use the GoPro application on your device to remotely monitor the security footage.
It’s simple and inexpensive to use your GoPro for home security monitoring. However, it might not be the best idea for a number of reasons. One is that the GoPro is designed for action shots. It’s not meant to sit on a shelf or to be mounted on a stationary tripod. Furthermore, GoPros tend to be quite small which means it won’t be as effective as a deterrent because potential troublemakers can’t see it.
GoPro Cameras: Home Security Tool?
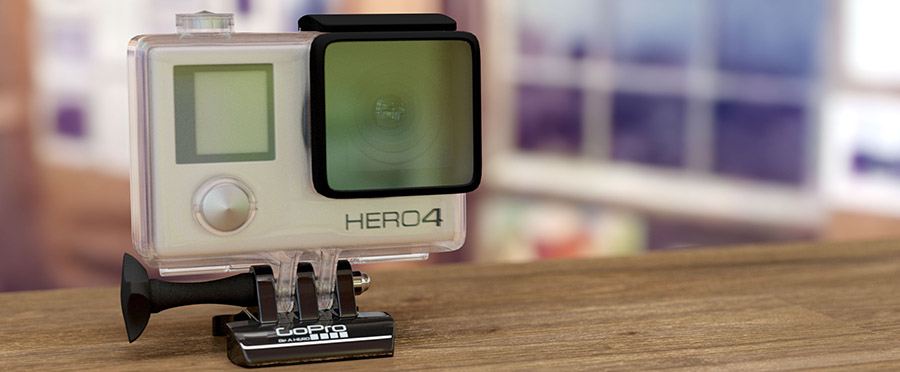

It might be a small, light-weight camera but the GoPro (on Amazon) can take a beating. Whether you use the GoPro Max or the Hero, the sturdy casing can weather everything from high winds and altitudes to rough terrain and water. It’s fairly difficult to break a GoPro camera, which is the primary reason why athletes use them for action shots.
Video footage captured by a GoPro tends to be quite stable as due to the in-built shock-mount system which most action cameras come with. Due to their small and compact design, GoPro cameras don’t need as much space for setting up; you can stick them almost anywhere, whether you want to catch your roommate or co-worker that always eats your lunch, or watch the front door when you’re not at home.
Is it a Good Option?
If you need a security camera and don’t have time to shop for one, your GoPro (or game/trail camera – our guide) can be a quick fix. Before you set your GoPro up outside or in your room, there are a few aspects to consider. For instance, are you worried about break-ins or do you need to catch a lunch thief?
If you need a small camera, the GoPro is a great option, and thanks to the mobile application, it’s very easy to monitor the footage regardless of your location. However, the GoPro is limited when it comes to larger spaces like a front or backyard because the angle isn’t quite as wide as cameras meant specifically for security purposes.
Put simply, GoPros pose a challenge if you want to monitor what’s happening around your home. Additionally, you can only watch one area with a GoPro camera, which means it’s not quite as versatile in terms of its capabilities. While a GoPro might be a great option for a small location (we actually have an article about security cameras in cars that comes to mind), you may run into issues if you need to monitor a much larger space.
How to Use a GoPro as a Security Camera

So you’ve decided that your GoPro is going to work just fine and you want to use it instead of a dedicated security camera (the same thing can be done with an Echo Show – our guide). Thankfully, it’s easy to install but you’re going to need a few other pieces of gear to get it up and running so it does the job effectively. Before you start recording, make sure to have the following items:
- A tripod to capture different angles
- The GoPro app on your connected device
- A USB cable
- A USB extension cord
Among all of the aforementioned products, the USB cable and the extension cord are the cheapest in comparison to the tripod. However, it isn’t necessary to buy the most expensive tripod on the market either, in fact, you might not need a tripod at all. It really depends on how you want to set up the GoPro. You can easily prop it up using whatever’s handy.
Download the GoPro App
Chances are if you’ve used a GoPro camera before, you’ve also downloaded the application for it already. However, if you haven’t, this is an important step for building your home security system because you want to be able to monitor the footage remotely. To download the application, follow the regular steps for downloading applications including clicking on the Install tabs and agreeing to the terms and conditions.
Once the application has been turned on, turn on the GoPro, and pair the app with your camera. The idea behind doing this first is so you can check your angles and coverage immediately, rather than waiting until the last minute only to find out you’re missing an important area.
Place the Camera
Due to its small size, the GoPro is not only easy to carry, but it’s also to tuck away in a corner or hide on a shelf. It doesn’t need a lot of space or a specific location to sit other than a flat surface and a clear line of sight. Having nothing blocking the camera’s view is incredibly important when using the GoPro as a security system, because if something is blocking its view, the footage won’t matter much.
In the case that you can’t get the angle you want when setting the GoPro down on a shelf or a table, it’s best to use a tripod instead. Before setting up your tripod, make sure it has enough room and there is nothing in its way. This will save you time in the long run because then you won’t spend any more time moving things in your space.
Set the Camera to Record
Because you’re using the GoPro as a security camera, you’ll need to adjust it so that it’s continuously filming. In order to set up your GoPro to record continously, you have to set it to “loop” in the “capture settings” of the camera’s main settings. Make sure to disable the automatic shut-off function if you want to record longer than 15 minutes.
Another important feature to check before you start recording is to ensure there is enough space on the SD card. If you don’t know how much storage your camera has, you just have to check the product information. If you forget to do this and you don’t have enough space, the security footage will overwrite old videos.
Because security filming takes so much time and storage capacity, it’s best to go out and purchase another SD card specifically for this purpose. SD cards are inexpensive nowadays and not hard to find either. If you need to get one, the 128 GB option from Netac (on Amazon) is probably one of the best SD cards for the price.
Check the Other Settings
In addition to selecting the “loop” option so the GoPro continously records footage, you’ll also have to check the camera’s resolution to determine how much space you need. There’s a balance between image quality and memory capacity, but if you want the most memory, it’s best to choose lower resolution settings.
A common recommendation is a 720p resolution but some people like to go all the way up to 1080p. Anything above 1080p is too much resolution and you won’t be able to record as much footage. If you can only review a few minutes of footage, the GoPro is effectively useless as a security camera, so it’s best to choose 720p resolution, or to use an SD card with maximum storage capacity.
Disable Unnecessary Functions
One of the advantages of GoPro cameras is all of the features and functions that make them one of the best options on the market for action videos. Unfortunately, some of these features can interfere with the camera when used for security purposes. Before using the GoPro, make sure to turn off all of these features.
In addition to disabling alerts and other sounds, you may find it best to turn off the audio recordings because cause they may be unnecessary and the additional recording will take up storage space. Because you don’t want to give the camera’s position away, turn off the lights in the camera’s menu, unless you want to use the camera as a deterrent.
Connect the GoPro Camera to Power
To connect the GoPro camera, you’ll need a USB cable that connects into the cameras port and the other end of the power outlet. This is one of the reasons why it’s best to own a USB extension cord because you’ll be able to connect to a power outlet that’s much further away. Additionally, you want to have your GoPro connected to a power supply and set to the wireless mode so you don’t have to worry about the battery running out.
Connecting the GoPro to Your PC
You’re not limited to only watching GoPro recorded footage on your mobile device. You can also view it on your PC. It takes a little more work to view videos but it’s nothing you won’t get used too. The GoPro application should already recognize your Wi-Fi network because it was one of the steps in the initial set-up. To connect to your PC, you have to find the IP address of the network the GoPro also uses.
- Most GoPro cameras use the IP address 10.5.5.9. If this doesn’t work, you’ll need to scroll through the router list. Search through it for GoPro and then click on the TCP?IP tab. You’ll find it in the System Preferences<Network<Advanced menu.
- Under “router” in the menu, you’ll find the GoPro’s IP address. Copy and paste the IP address to the 8080 port on the browser to connect the camera and computer.
Your PC should have a media player installed for easy footage access. There are many different media players to choose from, and while there are a lot of free options, the best ones cost money. You do want to make sure that the one you choose comes with the features you need, otherwise, your footage might be grainy, difficult to access, or have other problems.
Drawbacks
While a GoPro camera could work as a security camera, it’s not the best option because it’s simply not created for long, continuous, footage, additionally, latency can be an issue which we’ve talked about before. One of the main drawbacks is the life of the hardware, which the manufacturer says could be compromised if used beyond its capabilities, including continuous footage. This is why there is an automatic 15-minute continual recording setting.
Put simply, continual recording can cause the GoPro to overheat which will fry the inner components and destroy the camera forever. Not only does this mean you’re out a GoPro and have to buy a new one, but the footage will also be compromised, interrupted, or canceled altogether. In addition to lost footage and a destroyed camera, you may void the product warranty which means you won’t be entitled to a new one.
Additional Expenses
Even though it may seem like a way to save money, using a GoPro as a security camera may cause complications in the future, costing you more money in the long-run. Rather than use a system for something it’s not made for, it’s best to use a more robust option like a Nest camera (on Amazon) which is designed to perform security functions.
If you don’t already own a GoPro camera and you intend on purchasing one as a security system, know that it could be a big mistake. GoPros and dedicated security cameras aren’t similarly priced anyway, so you have to ask yourself why you would buy a GoPro to use it for something it’s not made for? Take a look at your budget and decide what you really need.
You may also find yourself purchasing additional SD cards if you don’t want to record over previous footage. Memory cards aren’t too expensive but can be hard to keep track of and label. Security cameras, assuming they’re real (more on this in our article), either store the footage in the cloud or a DVR so you never have to worry about running out of storage space.
Add-on Features
Security cameras usually come with convenient features like motion and noise detection which can save a lot of time when reviewing footage. Due to the nature of security footage, it’s incredibly unexciting because there won’t be anything going on for hours. To save time, there are add-on features for GoPro cameras such as motion-detection.
When using motion detection the camera will only start recording when movement is sensed and automatically shut-off when the movement stops. Since GoPro cameras are only designed to record for a few minutes, this add-on will reduce the wear and tear that will void the warranty.
Almost all home security camera systems come with motion-sensing technology including circuitry that detects sound, whereas varifocal cameras have the ability to zoom in and out which we’ve talked more about before. Sound sensing technology functions such that whenever noise is detected, the camera will immediately start recording. Either of the functions will save you time looking through boring security footage and come standard with security cameras.
How to Hide a GoPro or Security Camera
Not everyone is worried about who sees their security cameras, but if you’re trying to catch someone in the act, the GoPro’s small size makes it easy to hide. You can also find compact IP security cameras that blend in almost anywhere. Whether you’re trying to conceal a GoPro or a home security camera, there are some good tried-and-true tips:
- As we pointed out in our guide on outdoor/indoor cameras, security cameras often come with night vision so you can hide it on a dark shelf or corner. GoPros do have similar settings but image clarity can decrease.
- Try positioning a plant in front of the camera. You can find security cameras that can easily hide behind a house plant. The same applies to a GoPro camera if it can be positioned at the right angle.
Conclusion
If you aren’t using your GoPro and need to monitor a small space for a while, the action camera can do the job. It does come with risks, primarily its design, including the fact that a GoPro camera is only designed to record for fifteen minutes before automatically shutting off. To capture continuous video, you need to disable this function and this voids the manufacturers’ warranty.
A security camera is designed to continuously record without disabling any features, and comes with convenient functions, including being set up in a way where users can tell if it’s down or not (more in this in our guide) Even though you can use a GoPro as a security camera, it’s not recommended. Most of the time it’s best to use a device for the purpose it was designed for, and this is just one of those cases.