
Using LED lights is one of the best ways to both decorate and light up any space. Not only are LEDs very easy to use, but they are also quite affordable and versatile. There are even fancy Govee LED lights that you can control with Alexa or Google Assistant. Nonetheless, LEDs tend to come in quite long strips that might not seem so practical for your projects. So the big question is: Can you cut a Govee LED light strip?
Govee LED light strips are made to be cut into various lengths using a knife or scissors. You will usually find cutting lines to guide you. Follow the lines as closely as possible. If you cut outside the indicated lines, the entire strip will likely to stop working.
Always be sure that the strip you bought can be cut before you grab a scissors and get started. While the entire cutting process is relatively simple, you don’t want to risk getting wrong and ruining your LED strips. Let’s look at the steps involved in cutting Govee LED strip lights and how to connect them.
Can Govee LED Strip Lights Be Cut?

LED light strips come with many advantages, and one of them is that regardless of the type of strips you want, you can always have them cut to custom lengths.
On many LED light strips, you’ll find straight or dotted black lines throughout the strip. The lines are an indication of where you should cut the LED strips to avoid ruining a circuit. Do note, however, that every LED light has different cutting lines.
Usually, you’ll find the cutting lines after every 10 centimeters of the strip. You will also find copper soldering pads that appear in a symmetrical pattern on all sides of the black line. They are designed to show you how to properly do the cutting.
How Do You Cut Govee LED Lights Strips?
The beauty of LED lights is that they are designed to be cut into any length of your choice, and with Govee LED strips (on Amazon), the cutting is made to be as easy as possible. What you should focus on is where to cut the Govee LED lights.
Between every two or three LEDs, you will find clear cutting marks. Copper dots will surround the cut line on each side. Here’s the step-by-step process:
- First of all, make sure that your LED strips are working well. You may find this needless to do but there’s no harm in double-checking to confirm that they’re working. Also, note that cutting strips or soldering them can terminate your warranty.
- After that, you’ll want to figure out how long you want your LED strip to be. Doing this means you will have to check the area of installation and carry out a measurement very accurately. Once you’re done with that, select the cutting point on your light that’s closest to this length.
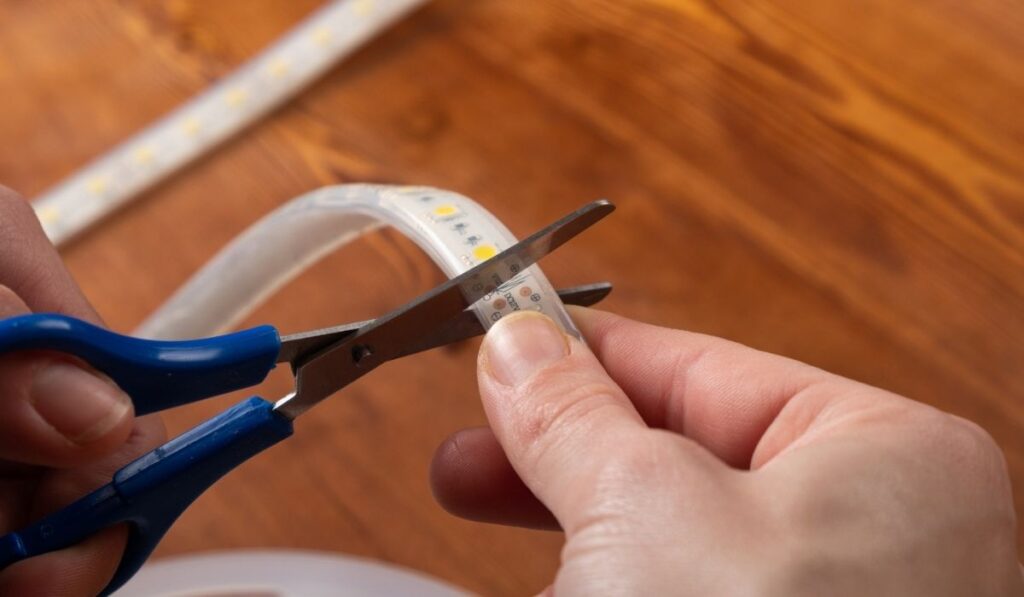
- Cut along the indicated lines properly and accurately using a knife or a pair of scissors. Because LED lights are made to be cut, you shouldn’t worry about receiving any shock.
- Know how you’re going to connect the light to a power source. Although most reels are designed to be pre-fitted with a power socket, you still have to get a new socket because cutting the LED lights gets rid of it.
- You have the option of soldering a new socket onto the light or using a strip power source connector.
Govee LED Lights Not Working After Cutting?
If you happen to cut the light too short by mistake, you may be wondering if it is still possible to reconnect the two pieces or if you have to buy a new light.
In this case, as long as you cut along the dotted cut line, the LED lights can be reconnected.
You have different methods to reconnect the two pieces of light strip. The simplest method is to use connectors, which are readily available. Also, they come in various shapes like right angles and T-tap.
How to Connect Govee LED Lights
After achieving the proper length of the LED lights strip, what you should do next is to connect it to a power source and put it wherever you want. While this is certainly doable, it is also the most complicated part of the entire process.
There are two basic methods to apply in this case.
Clipping


Not only is this method the easiest, but it is also the fastest way to go about it, as all you need to do is use a Quick Connector (on Amazon). What is a Quick Connector?
A Quick Connector is a simple device that you can purchase from any hardware store or online. This method is a very stress-free solution if you want to connect the copper dots on the LED strips to the electrical circuit.
Here’s how to go about it:
- Pull the plastic bar 1/8 in (0.32 cm) away from the quick connector. It’s normally black and you will find it at the end of the connector. You should pull it gently as it is very fragile.
- Find the plus and minus ( + and —) symbols on the back of the LED strip, located on the other side of the copper dots. You should see two wires (one black and one red) attached to the connector. Line up the black wire with the minus (—) sign and the red wire with the plus (+) sign.
- Remove the adhesive backing off the LED 1/4 in (0.64 cm). Ensure that you pull it back just enough to uncover the connector’s copper dots/terminals. If you find a plastic cover instead of an adhesive backing, cut the plastic off the terminals gently using a box cutter.
- Plug the copper dots of the LED into the quick connector.
- Close the LED’s plastic bar back over the quick connector.
- Using a terminal wire connector, connect the wires of the quick connector to a power source. You can purchase this from any hardware store if you don’t have any. Connect the Red and black wires to the appropriate slots on the terminal wire connector.
After that, just turn the screws of the connector in a clockwise direction to screw the wires into place. Plug everything into a power source and then you’re done.
Soldering
This is an alternative to the quick connector that works similarly, but we recommend that you make use of a quick connector instead. Here’s how to go about it nonetheless:
- Do away with the adhesive backing or plastic cover on the LED strips’ copper dots.
- Use a soldering iron to heat it. If you don’t have a soldering iron, you can always get one from a hardware store. Use the soldering iron to melt the solder wire directly over the copper dots. Try to melt just enough of the wire to create small puddles of metal covering the copper dots on the LEDs.
- Get a plastic end cap and cut a small hole in it with a box cutter — small enough for a couple of wires. If you don’t have a plastic end cap, you can get it from a home improvement store or a hardware store.
- Pass the red and black wires through the plastic end cap’s hole after cutting them to the length you desire.
- Strip half an inch (1.3 cm) off the end of the wires using wire strippers. You can always get wire strippers from a hardware store or online, such as the WGGE Professional Wire Stripper (on Amazon).
- To wrangle the frayed strands together, twist the end of each wire. After that, use the soldering iron to melt the solder on the exposed wires.
- Ensure you match the polarity of each wire (black with the minus and red with the plus signs) and solder the wires to the metal you’ve already soldered over the LEDs’ copper terminals.
- Connect the wires to a power source. An alternative to using a terminal wire connector is to twist the wire ends and cover them with a shrink tube. You can also use an end cap.
- To make it safe to touch, glue a plastic end cap to the connection between the LEDs and the wires. Silicon glue is a good recommendation because it won’t have any interference with the electric connection.
And that’s all. Once you’re done, just test the lights to check if they works. If they don’t work, the likely reason is that you connected the wires incorrectly.