
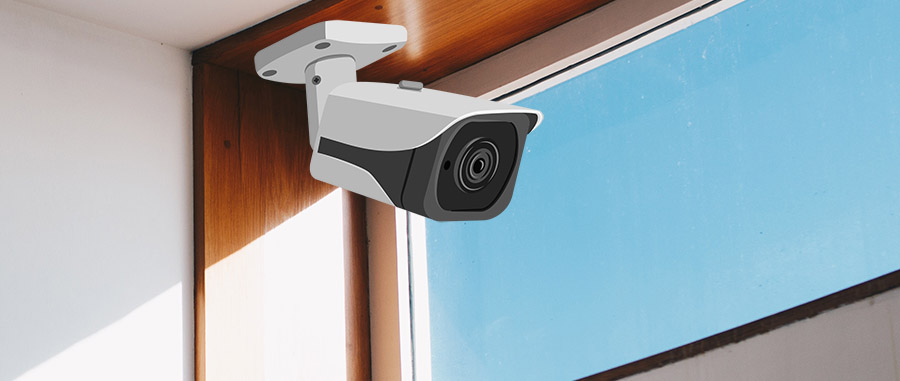
Several factors might lead someone to consider placing their security camera on the inside of the window aimed outside. Maybe it’s HOA regulations restricting the installation of security cameras outside the house, or the need to monitor a specific area covertly. And then, of course, there’s avoiding the hassles that comes with wiring and installing equipment outside. But will an indoor camera work through a window?
You can definitely use an indoor security camera through a window, but there may be some limitations caused by the fact that these cameras are not designed to be used this way, like glass windows reflecting the IR lighting and blurring the image at night.
This article will provide tips to give you more success when using an indoor camera through your window. We’ll discuss the features of an indoor camera that you might lose if you point it out the window, and some of the benefits you might gain from this tactic. If you’re considering using an indoor camera this way, be sure to do your research, because there are some big caveats.
Using an Indoor Security Camera Through a Window

During the day, any type of security camera will see through a window just fine, as long as you position it correctly. While the glass layer might alter the camera’s vision a bit, it will not be enough to cause any significant difference if you are not using tinted glass. The only problem you might deal with is a slight reduction in identification distance.
Nonetheless, you still have to make sure that the room’s own lighting does not interfere with the lens’ ability to focus and produce clear images. This is why experts recommend placing the camera in a darker room, which avoids a lot of that glare.
What About at Night?
Nighttime is when the challenges of using an inside camera for outside surveillance become apparent. As mentioned, security cameras utilize infrared for night vision. They have in-built infrared LEDs for that purpose, and they work as follows:
- The security camera, whether pointed at a street (our guide) or used as a baby monitor, transmits infrared light
- The infrared light bounces off objects in the surrounding
- The light is reflected back to the camera’s sensor
- Your security camera processes the reflected infrared light into an image
For the most part, this process works like a charm, which is why outdoor security cameras yield high-resolution images or videos. However, a simple, transparent thin layer of glass can alter the resulting image tremendously. This is because the window is one of the objects that the infrared transmission from the camera bounces off of.
Consequently, the first image that the camera processes is the reflection of its own LED lights on the window, thus making it nearly impossible for you to make out what is going on beyond the window. This window glare is characterized by whiteout images and washed out videos.
Motion-Detection is Also Affected

People invest in motion-detection security cameras to avoid having to record every second. Motion-detection security cameras usually start recording when they detect movement within their range of coverage. Regrettably, this capability is also compromised when there is a pane of glass between the camera’s lens and the outside.
Motion detection in security cameras works via either one of two ways: pixel change or passive infrared motion detectors. For pixel change, cameras that utilize this technology come with software that measures the change in pixels in the image when something gets within range, thus alerting the camera to start recording.
Passive infrared motion detectors, on the other hand, are triggered to record when their sensors detect body heat. For the most part, passive infrared motion detectors are preferred to their pixel change counterparts because they’re more effective.
However, passive infrared motion detectors do not work well – if at all – behind glass. Since they rely on detecting body heat to trigger the motion sensors, that capability is neutralized by insulated windows (which are what most homes have nowadays).
Therefore, if you are looking to place a security camera behind a window, you will be better off having one that detects pixel change to trigger motion sensors.
Making it Work
Let’s talk about how to make your indoor security camera better at taking outdoor images and videos while behind a window, also, make sure to check out our troubleshooting guide if you run into problems. First here are couple of great camera options: the Nest Labs Wifi-enabled Indoor Camera (on Amazon) and the Logitech Circle 2 Indoor/Outdoor Wired Home Security Camera (on Amazon). With these cameras, you will not have to perform as many adjustments to obtain clear images at night.
Reduce the Distance between the Lens and the Window
This will help you reduce the amount of glare significantly. This is because there will not be nearly enough distance for effective reflection from the glass to occur when the unit is almost touching the window. Therefore, consider securing the camera as close to the window as possible using glue or tape. A suction cup mount can also come in handy.
Turn Off the Infrared Lights
Since most of the glare results from infrared light being reflected back to the lens, turning it off eliminates glare substantially, thus allowing you to obtain clearer images. Not all models will allow you to mess with these IR lights, so you’ll want to do your research ahead of time to make sure the camera model you’re considering has this function.
Disable All Other Lights
The other cause of glare is the status lights on the camera. Turn off all those lights to do away with glare entirely. In the case of a camera like the Nest Indoor, you can simply cover the led status indicator with a bit of electrical or duct tape. That should work for any camera, but be sure to use a small piece of tape so that you don’t cover any of the main optical sensor.
Install Motion-Activated Lights Outside
Considering that you have deactivated all sources of illuminating light from the camera, you will need to provide the camera with another source of light for night vision. One option would be to leave the porch light on at night. If you want to be more tactical about it, you can install motion-activated lights outside that only trigger when there’s motion.
This is actually a really good option for cameras that are always-on. If you ever do have to review the full nights video feed, it will be easy to fast-forward through the video watching for a burst of light in the darkness. So the motion-activated light actually makes a large video file easier to sort through.
Use an Infrared Illuminator
If you do not like the idea of motion-activated floodlights, the infrared illuminator is worth considering. This is a small device that floods your entire yard with infrared light. Since our eyes cannot perceive this type of light, your yard will remain dark. However, to the camera, it may as well be daylight.
Clean Your Windows
This one’s easy to miss: you’ll want to make sure the window is clean, free from large smudges or dust and debris, on both the interior and exterior. A blurry or smudgy windowpane will obviously result in blurry or smudgy footage, but dust can cause the camera to focus on the wrong thing, capturing a full night of nothing but an unfocused video feed.
Outdoor Cameras
Typically, you’d be better off using an outdoor camera to survey your yard. An indoor camera will do the trick, but by now it’s obvious to you that there are several complications. That said, if you have a spare indoor camera, it can’t hurt to try it out.