
The Steam Deck is portable and allows you to access all the games available on Steam, no matter where you are. In addition, it has a large storage capacity and robust systems, making it a perfect option if you want to take your gaming experience to the next level. But can you connect your Steam Deck to your TV or a large monitor?
The Steam Deck can be connected to a TV or monitor using a USB C to HDMI or a USB C to DisplayPort adaptor, depending on your available ports. You can also wirelessly cast the Steam Deck to a smart TV using Remote Play and the Steam Link app, but you’ll need a strong WiFi connection.
If that all sounds a bit complicated, don’t worry. Let’s take a closer look at how exactly to connect your Steam Deck to your TV so that you can get started right away.
How to Connect a Steam Deck to a TV

You can connect your Steam Deck to your TV using these three methods:
Using HDMI Cables
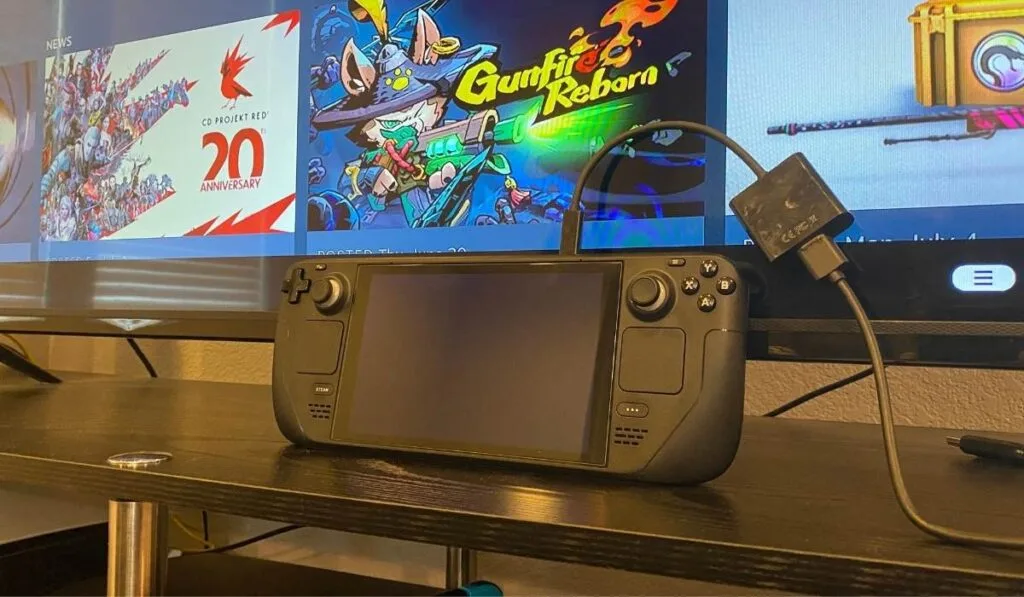
Because the Steam Deck doesn’t come with a built-in HDMI port, you’ll need the right HDMI to USB-C adaptor (on Amazon) and an HDMI cable to connect it to your TV. Luckily, you can easily buy them online.
Just don’t go for the cheap and unbranded options, as they can malfunction and ruin your gaming experience. Here are the steps to connect your Steam Deck to your TV:
- Position your Steam Deck near your TV. This will depend on the length of your HDMI adaptor cable.
- Locate a free HDMI port on your TV. Most modern TVs come with more than one HDMI port labeled HDMI 1, HDMI 2, and so on, depending on the number of ports it has.
- Turn on your TV and connect one end of the HDMI cable to the HDMI port on your TV securely.
- Connect the other end of the HDMI cable (USB-C end) to your Steam Deck’s USB port. Be gentle so as not to damage the device and the cord.
- Select ‘Input Mode‘ on your TV with your remote. You’ll see TV, AV, Component, VGA, HDMI 1, and HDMI 2 (if it has multiple HDMIs). First, select either HDMI 1 or HDMI 2. Once you select the ‘Input Mode,’ you should see the Steam Deck image on your TV screen.
- Set the steam deck screen display to your liking by using the Steam Deck’s Display Settings feature.
Using DisplayPort 1.4
This is another option if you don’t have an HDMI to USB-C adaptor or you’re trying to connect to a monitor instead of a TV. DisplayPorts are technically better than HDMI ports because they come with MST (Multi-Stream Transport), which means they can connect to multiple displays from a single point.
Also, DisplayPort supports a higher bandwidth than HDMI. On top of that, DisplayPorts are more advanced and have better resolutions and frame rates.
However, the Steam Deck doesn’t have a display port. It only has a USB C port. You can therefore use a USB C to display port adapter (on Amazon) to make the connection.
The connection process is similar to the one we described for HDMI cables, only that you’ll need a DisplayPort 1.4 cable. Here’s how to do it:
- Locate a free display port on your monitor or TV (if it has one).
- Connect one end of the DisplayPort cable to the display port on your monitor.
- Connect the other end of the DisplayPort cable to the adapter and then to your Steam Deck.
- Turn on the TV and the Steam Deck.
- Select the ‘Input Mode‘ on your TV. In this case, it would be the ‘AV Mode.’ Once you do this, the image of the Steam Deck will appear on your TV screen.
- Set your screen appearance to your preference using the Steam Deck’s ‘Display Settings‘ feature.
Using Steam Link
Like every other great gaming platform, Steam offers Remote Play, which allows you to wirelessly stream games from your Steam Deck to another device, such as a phone, tablet, computer, or TV. However, Remote Play is an in-home streaming service, which means both devices must be on the same WiFi network for it to work.
When using remote Play, your TV gets the audio and video signal while the game is controlled by the primary device, Steam Deck in this case. It only mirrors the screen, so you can’t play the game from the TV itself, but it’s a great way to enjoy a big-screen gaming experience without any hassle.
The only catch is that Remote Play only works with smart TVs that can run the Steam Link app, and you’ll also need a strong and stable internet connection for the best results.
To connect your Steam Deck to the TV wirelessly:
- On your TV, Navigate to the app store and download Steam Link.
- Launch the app and log in with your Steam credentials.
- Connect your Steam Deck to the same Wi-Fi network as your TV.
- Navigate to ‘Settings‘ on the Steam Deck, go to ‘Remote Play,’ and enable it.
- Go to ‘Advance Host Option‘ in the Remote Play setting, enable ‘Change desktop resolution to match streaming client,’ and tick the ‘Prioritize network traffic.’
- Now go back to your TV, on the Steam app, navigate to ‘Settings,’ go to ‘Computer,’ and select ‘Steam Deck‘ from the list of available devices.
- You’ll get a four-digit code; enter the code in the pop-up message on your Steam Deck. Then, it’d start casting the screen to your TV.
- Navigate to your gaming library on Steam Deck. You should see an option of ‘Remote Play‘ at the corner of each game’s thumbnail image. Select the game you want to play and hit ‘Remote Play.’
The game will start streaming on your TV, while all the game controls will still be on your Steam Deck.