
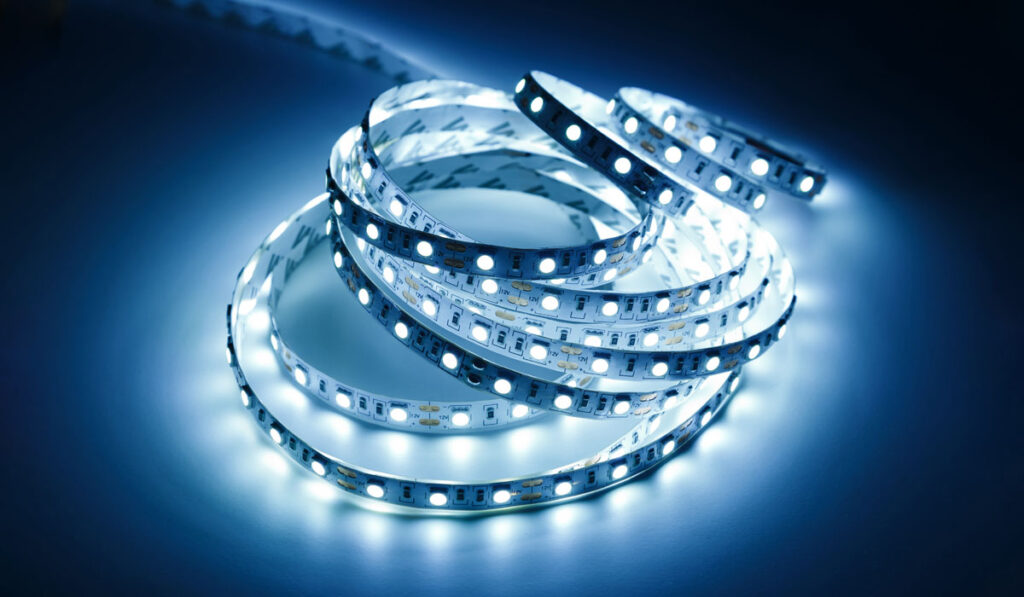
LED light strips make great home decorations, and many even use them for outdoor lighting. The simple design makes it easy to enhance a space. The lights look great around your audio setup and they’re also a breeze to apply with their 3MM backing. However, sometimes you need to move your LED light strips. You might be moving to a new place or want to place the lights somewhere else. This leaves the question of how you can remove and reuse your LED light strips.
To remove and restick LED light strips, unplug the light strip and then use a hairdryer to heat the adhesive backing. Then, you can carefully remove it from the wall without damaging the paint. After that, using an inexpensive double-sided sticky backing will allow you to mount the light strip somewhere else.
As you probably just learned, it’s not that hard to remove an LED light strip, though you need to be careful. Another point that’s worth mentioning is that you also need to reapply an adhesive backing to restick the light strip to another wall. Let’s talk through a few details on how to get this right, so that you can reuse and recycle your LED light strips effectively.
How to Reuse LED Light Strips

One of the advantages of using LED light strips is you can take them with you…they’re not like light fixtures that, once installed, have to stay with the house or apartment.
Since the lights look great when they’re set up, there’s no reason to leave them behind when you move. Once you’re settled in your new home, you can restick your favorite decoration on the wall as long you take the proper steps.
On the other hand, you might not be moving but want to put the light strips on a different wall or room. If your entertainment system is audio and visual, the bright-colored LED lights can interfere with image quality. Whatever your reason for wanting to move the strips, it’s not hard to get them off your walls with a little patience.
How to Remove LED Light Strips Without Damaging your Walls
Unless changing the color of your walls is the reason the LED light strips are coming down, you probably don’t want to have to touch up missing paint sections. LED light strips have a strong adhesive backing that keeps them securely attached to the wall. The adhesive is capable of pulling off paint. You don’t want to rip the strips off, instead, take your time and carefully peel it away.
It’s best to start at one end. Trying to peel the strip off in the middle is frustrating. It can also damage the strip and wall. Once you have an end loosened, carefully work your way down the strip until it’s completely free. Now it’s ready for you to restick it on a different wall.
And it’s worth noting that sometimes the adhesive backing is simply too strong and won’t come off cleanly. In this case, just embrace that you will need to either leave the light there or repaint, and plan accordingly.
That said, most models will use an adhesive strip that, while strong, will give when you apply some heat. We’ll discuss in our step-by-step section below how you can use heat to maybe protect your wall and streamline the removal of your light strip.
How to Restick your Light Strip Somewhere Else (Without Damaging The Paint!)

The goal is to reuse your LED light strips after taking them down. There’s no reason you can’t use the strips on another wall. The only problem is getting the light strips to last after you’ve taken them off the wall because the adhesive backing is lost when you take them down.
However, don’t fret because you do have a solution, and it’s also easy and inexpensive so no worries there either. Simply purchasing and applying another double-sided backing like Large Command Strips (on Amazon) or Double Sided Mounting Tape (also on Amazon) will enable you to restick your light strip up.
And if you use the command strips, you may need to use a ton, but you’re more likely to be able to remove the strips without damaging the paint because those strips are designed specifically to protect the walls.
Removing and Resticking LED Light Strips in 4 Easy Steps
When you’re ready to take LED light strips down and restick them somewhere else, there are 4 easy steps you want to follow. Let’s start with the first and most basic one, unplugging the light strip and heating the adhesive as well.
Step 1: Unplug the Light Strip and Heat the Adhesive
It seems obvious to unplug any electrical device before working on it, but light strips are a little different. Sometimes the extra light is helpful when you’re trying to see the end of the strip. Even though LED lights are low-voltage, they are still plugged into a 120V outlet. Unplugging the lights ensures you won’t get an electric shock.
The adhesive on the back of the LED light strip won’t peel easily away due to the fact it’s designed to stick to a surface for years. If you’re not careful, pulling on the strip will remove paint. To prevent damaging the wall, heat the adhesive before removing the light strip (a hair dryer works great for this). You can concentrate the heat precisely where you want it.
Move the blow dryer along the length of the strip slowly and maybe on lower to medium heat. You want all of the adhesive to soften and loosen without causing any damage. It will make it easier to pull the strip off without removing any wall paint. Apply the heat until you notice that it’s getting easier to pull the strip off.
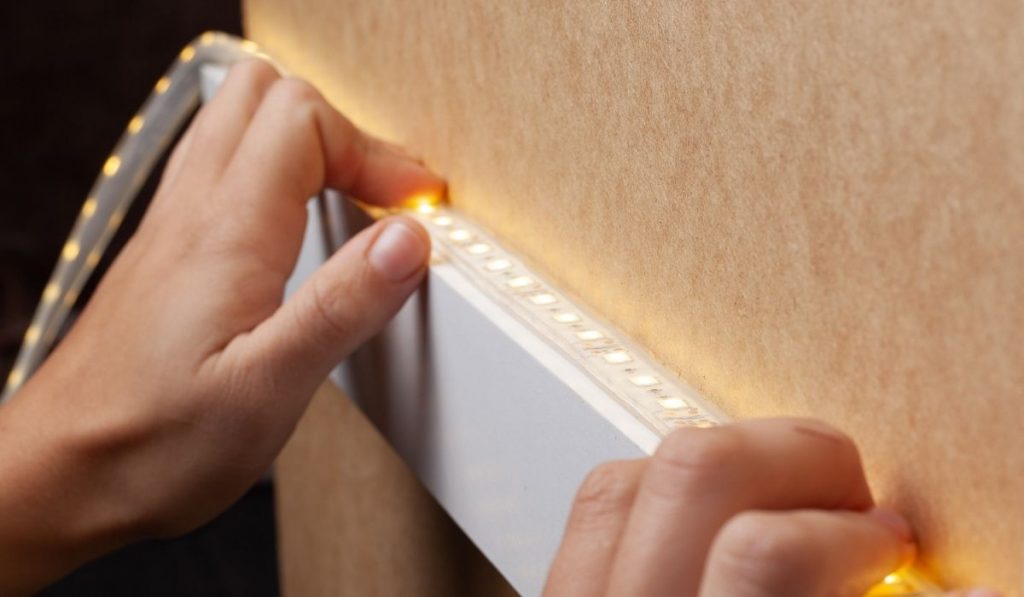
Step 2: Find an End and Corner
It’s easier to start at the end of the strip and it doesn’t matter which one. Find a corner that you can easily reach. You also need a thin, flat object, like a coin, for instance, which will work great, especially dimes. You can also use a credit card or a butter knife. Regardless of which item you use, be careful you don’t chip the paint.
You want to slide the flat object underneath the corner. The adhesive should be soft from the heat, so you just need to work it in. Once you have a corner lifted, you’ll keep wiggling the object underneath the length of the cord until you reach the other end.
The back and forth motion doesn’t scrap the wall surface, while also gently lifting and removing the light strip. If the adhesive is really tough, enlist a helper to hold the hairdryer and continuously warm the adhesive as you move along the length of the light strip.
You want to pull gently on the strip as the adhesive releases. Pulling too hard can damage the strip and the wall. You don’t want to stop removing the LED light strip once you get started. The blow dryer only softened the adhesive for a little bit. Once it cools, the adhesive rehardens, and you run the risk of damaging the wall.
Step 3: Remove the Sticky Residue
After removing the LED light strip, you’ll see a sticky residue on the wall. Don’t worry, it doesn’t mean the wall is damaged, it just means that it only needs a good cleaning. If there is only a little residue, you can use your thumb.
Rub the stuck-on adhesive in a circular motion. It causes it to ball up and you can easily pick it off your wall. If there’s a lot of it, grab a soft sponge or rag and use soap and water to clean it off.
Step 4: Reapply the Adhesive and Reuse
When you know where you’re going to reuse the LED light strips, it’s time to reapply the adhesive. As we listed above, you can use one of two great options: Large Command Strips (on Amazon) or Double Sided Mounting Tape (on Amazon) to effectively stick your light strip back where you want it. To ensure that the lights last as long as possible, check out this article for more tips on operations.
Other Pro Tips On Light Strip Moving & Management
One great thing about light strips is they’re such a simple product that lots of people use them and have a wealth of experience to share. RV owners use light strips, and notice that they tend to fail more quickly in humid weather. In this example, silicone epoxy is the solution for holding them in place, but obviously if you use that on a wall you’ll tear the paint right off!
Auto enthusiasts sometimes add light strips to the interior or exterior of their vehicle, and this can be accomplished with simple light strips like you use at home (although, as one user learned in a forum here, the install can be electronically complicated if you’re trying to do something fancy.). Es explained in another forum post – the more complicated your install is, the more you’ll have to learn about “lighting circuits” and other complex stuff.
Our recommendation is to keep it simple: have a few, or one, continuous light strip, with one switch controlling it. This will keep you sane and keep things manageable!
Common LED Light Strips
Anybody who has used them before knows that LED light strips do amazing things to a room, and they’re even more amazing after you’ve figured out how to throw a dimmer switch into the mix (our tutorial). The various colored lights add ambiance and highlight features.
The strips are also fun to play with and see what designs you can create on the wall. If you’re looking to add LED light strips or are just getting started decorating with them, here are a few popular models.
Minger LED Strip Lights
Minger LED strip lights (on Amazon) aren’t your standard LED light strip. It’s the reason why it’s fun to decorate with them. In case you don’t know what these are, these are lights that actually change color. You can set it to one color, or let them change from pink, red, green, and blue.
With 16.4 feet to use, the light strand is perfect for any room in your house. The electric strip is not water-proof, but you can use them in bathrooms and kitchens and they’re also easy to install because the adhesive securely holds the strip in place.
The strip is also slightly flexible, giving you more room for creative designs. It even comes with a remote for easy control.
Phopollo LED Light Strip
Depending on your room size, with over 65-feet of LED lights, the Phopollo LED strip (on Amazon) might be long enough to wrap all four walls. If you want to make a statement, these color-changing LED lights are the answer.
The thin light strip comes wound on a wheel which makes installation quick and easy. You don’t have to worry about the long string of lights getting tangled as you are attaching them to the wall.
The adhesive backing is designed to hold the light strip in place for years. Since the strip uses LED bulbs, you know they’re long-lasting. You can choose to have multiple colors or a single one.
It’s up to you what you create with the light strips. An included remote makes controlling the lights a breeze.
Relocating LightStrips: The Final Word
Wrapping everything up, I hope you’ve realized that it’s not that hard to reattach LED light strips, which are probably one of the most convenient lighting features a person could add to their home.
Regardless of what you need to move them for, it’s not a process that you have to be scared of because you can do it without stripping paint off the walls or damaging the wallpaper. You can remove and reuse your LED light strips.
It only takes some time and a blow dryer. Heating the adhesive before trying to remove the LED light strips is the best way to about doing this because when the adhesive is softened, the strip almost peels away.
You do need to loosen it at the corner, and carefully peel the strip off. If you take your time, both your LED light strip and the wall should be undamaged. Apply new adhesive, and the strip is ready for a new wall.