
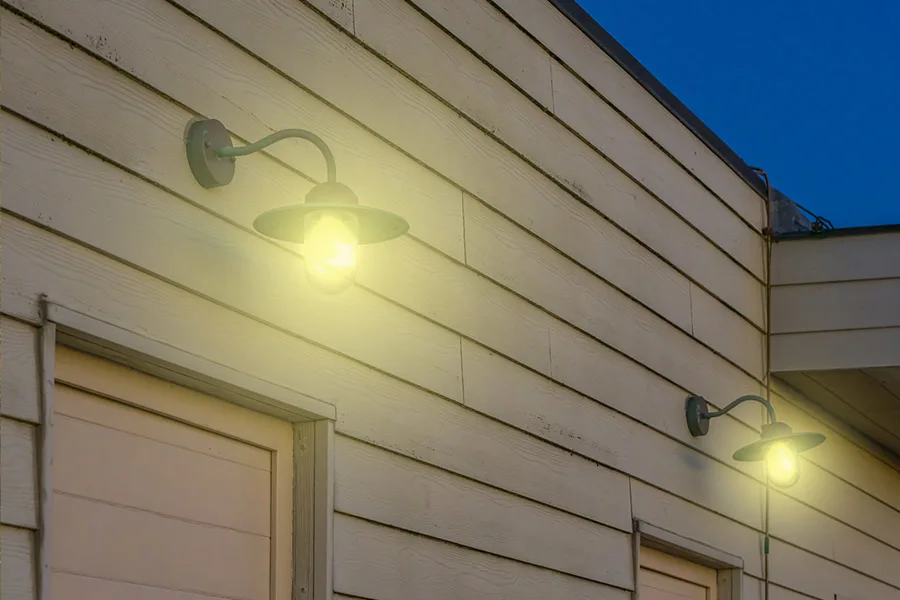
After you get all of your outdoor lights arranged outside of your house or your business, you may find it a hassle to remember to turn them on or off. Perhaps you only want them on when it’s dark outside, or to only stay on for a set period of time, like a few hours. Whatever your specific needs are, if you’re hoping there are some ways to use a timer on your outdoor lights, this is the right article for you.
You can put outdoor lights on a timer a few different ways, depending on the type of light you use. For lights wired to a switch, a timer will need to be installed at the switch. With smart bulbs and lights, the setup is much simpler, typically using an app or with a smart home hub. For lights that are plugged in, a simple outlet timer can be used.
Outdoor lights can provide an ambiance and welcoming feeling to outdoor areas and also provide better security. If you want your outdoor lights to operate efficiently and stay on for a set amount of time, you need to use a timer. To learn about the types of outdoor timers and how to install them, first let’s cover the various types of outdoor lighting timers.
3 Reasons Why You Should Use Timers On Outdoor Lights

Real quick, let’s talk about why this is worth figuring out at all. You probably have 1 reason you want a timer on your lights that led you here, but you should be aware of the other key benefits of using timers with your outdoor lighting, which are why we recommend them for most people:
- Energy and cost savings: Timers allow you to set your lights to turn on and off at specific times, which can help you save energy and money on your electric bill. By preventing lights from staying on for long periods of time, you can conserve energy and save money in the long run.
- Convenience: Timers provide a convenient way to control your outdoor lighting without having to manually turn them on and off. This is especially useful if you have a large property or if you’re away from home for extended periods of time.
- Safety and security: Timers can also enhance the safety and security of your home by providing automatic lighting. You can set your porch light to turn on at a certain time or when motion is detected, which can deter potential intruders and make your home safer.
These timers check a lot of boxes. We cover smart-home devices and home security extensively on this blog, as well as sustainability and renewable energy. This is the rare moment when all three of those things are driven forward by just one management tactic: using timers. Let’s go deeper!
Why Not Just Use Motion Lights?
The thing is, motion lights are just a different tool. They’re not interchangeable with wired lights on a timer, unless the purpose you want to use the timer for would also be solved by motion sensing. As some users (form link) have noted, it’s actually much more expensive to have motion detectors at each light, as opposed to a simple wired switch, but we know there are unique situations out there.
Don’t feel like you have to embrace a false dichotomy of either or: you can have motion lights, timed lights, and as we’ve looked at before, even game cameras in your yard if you want to!
Types of Outdoor Lighting Timers
If you want to put a timer on your outdoor lights, there are many options for you to do this, so don’t worry. One thing that’s important to pay attention to is that the timer hardware is outdoor rated. Outdoor-rated timers are weatherproof and are designed to be more robust than indoor light timers, which means they’ll be able to endure much harsher conditions.
Outdoor timers can withstand harsh, repetitive changes in temperature, humidity, and sunlight intensity that are very normal in day-to-day life outside. Any type of outdoor timer can get the job done, here is some information on a few different outdoor timers that are great options.
We’ll unpack the main types of timers below, with some links to examples, but for now here’s a summary table you can use for quick reference:
| Type of Switch | Key Features | Relative Cost |
|---|---|---|
| Mechanical Outdoor Outlet Timer | Simple dial-type setup, Can drift by an hour or two, Requires adjustments | $ |
| Photoelectric Outdoor Timer | Light sensor activated, Can sometimes wear out, Remote control functionality | $$ |
| Switch Timer/Smart Switch Timer | Programmable auto-shutoff, Needs electrical wiring, Can be controlled remotely | $$$ |
| Smart Outdoor Lights | Built-in router connectivity, Needs smart hubs, Optional wireless smart switches | $$$ |
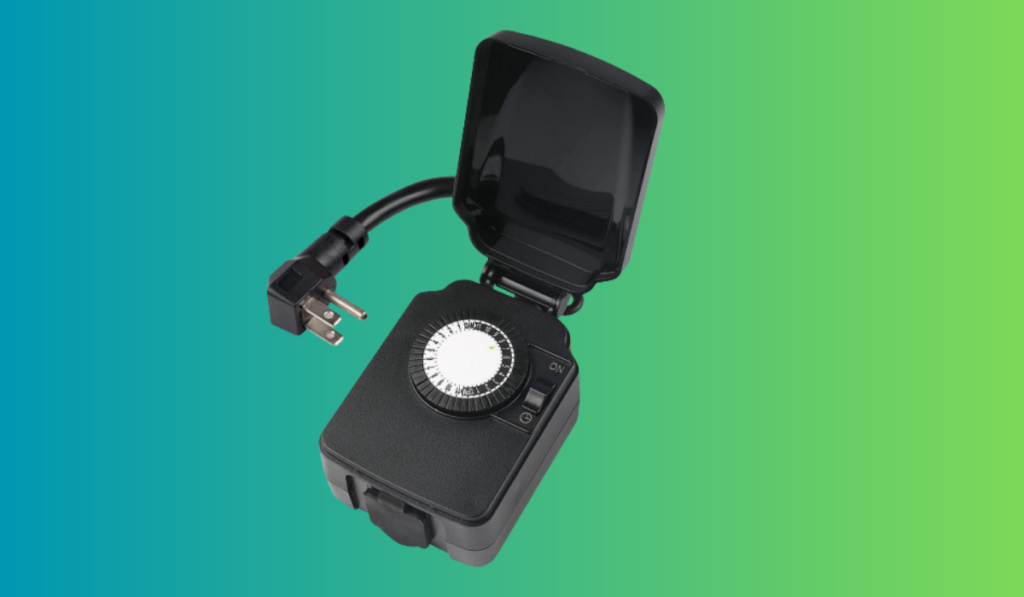
Mechanical Outdoor Outlet Timer
If you have existing lights that plug into an outdoor electrical outlet, likely the easiest solution for you is to add a plug-in outdoor mechanical timer. Mechanical timers, like this outdoor Christmas light timer (on Amazon) with 2 plugs are an easy dial-type timer setup. You can set it to be on for 14 hours and off for 10 hours for example, automating the use of the lights.
Mechanical outdoor timers are easy to use. However, you may have to check them every week or so to make sure they have not drifted by an hour or two. This can be a hassle but still saves you from remembering to turn the lights on or off.
Most units don’t have any problem with this, but keep an eye out…if this is going to happen it’ll happen immediately, on the first day or so. If you’re using these type of plug timers for year-round use, then you’ll have to adjust the timers during daylight savings shifts, and whenever the power goes out.
Photoelectric Outdoor Outlet Timer
Photoelectric outdoor timers are similar to mechanical timers, however, they have a light sensor instead of a mechanical dial. The light sensor detects sunlight and can be set to turn off (or on) however many hours after sunset you’d like to set them for. The advantage of this is obvious, but a common problem is that the light sensors can sometimes wear out.
Devices like this 24-hour outdoor photoelectric countdown timer (on Amazon) with 3 outlets are easy to set up too. They can also be set to various on/off intervals, and it comes with a remote to change the timer settings so you do not even have to go outdoors if you don’t want to.
Like the mechanical outdoor timer, photoelectric timers are also a great option if you have existing lights that plug into an outlet that you want to add a timer control.
Switch Timers & Smart Switch Timers
If you have outdoor lights that are controlled by a light switch, you can purchase a light switch that has a built-in timer. Timers like this programmable light switch timer (on Amazon) with automatic shutoff make turning off your outdoor lights easy. With a touch of one button, you can program it to turn off after, 5, 10, 20, or even thirty minutes. You can even extend it from up to 1 to 4 hours.
Besides a traditional switch timer, you can also use this smart switch timer (on Amazon) and control your lights from anywhere with an internet connection and you can check out more on smart bulbs and how to use them in our separate guide. Smart switches can still be turned on/off with the physical switch, but can also be operated with voice commands, mobile apps, and automatic triggers based on the time of day set in the smartphone apps.
Smart switch and traditional timer switches do require you to remove your existing switch from the wall electrical junction box. If you do this, make sure your main power is off first! If you are just not comfortable messing with electrical wiring, you can hire an electrician for help.
If you like the idea of a smart switch that doesn’t require any electrical work, rest assured there are some wireless options for smart switches in the next section.
Smart Outdoor Lights
If you would like to take an even easier route to get timer control on your outdoor lights, you can purchase smart bulbs and lights. Smart bulbs have built-in connectivity to your router, typically through a hub. For example, Philips Hue has great smart bulbs that can be controlled through their app and with smart hubs, like Google Assistant, Apple Home, and Amazon Alexa, all of which you can use to set timers for the outdoor smart lights.
Some Philips Hue smart lights require the Hue Smart Hub (on Amazon), and some do not. However, if you are using multiple smart devices in your home it is best to use the Hub to prevent your router from getting clogged up and slowed down.
For ultimate simplicity and ease of use, you can even incorporate a Phillips Hue Smart Switch (on Amazon) or a Smart Dimmer Switch (on Amazon). Unlike the traditional wall switches, these smart switches are battery-powered and work by connecting to your network and smart home system. As such, they do not get connected to your electric system and you do not have to worry about wiring into a wall socket.
The smart switches are actually stand-alone switches that you can mount anywhere in your home by using the included adhesive backing. Another great thing is that you can control more than one smart light with a single switch. With these smart switches, you can create a routine that will turn the lights off after they’ve been on after a certain amount of time.
How to Install a Timer on Outdoor Lights


Depending on the type of timer you plan to utilize to control your outdoor lights, your installation will differ. If you are doing any type of installation where you have to work with exposed electrical wires, please be safe and make sure your power is off. Here is a brief overview of how to install each option, including the first which is the outdoor outlet timers installation.
Outdoor outlet timers, both mechanical and photoelectric are very simple to install. All you do is plug them into the wall outlet, then you plug your lights into the timer. You can easily change the settings of these types of timers with mechanical knobs and/or push buttons.
Installation of Switch Timers & Smart Switch Timers
Out of all the timer control options, smart timers and smart switch timers are the most physically difficult ones to install. Before installing/uninstalling any wall switches, turn off your power first. To install wall timers, you first have to remove your existing electrical switch. Here are the basic installation steps. But let’s lay it all out in some nice, clean steps:
- Choose your timer/switch unit: As we’ve discussed, there are a variety of timers available for outdoor lights, including mechanical and digital timers. Choose the timer that best fits your needs and budget.
- Turn off power to the lights: Before installing the timer, turn off power to the lights at the circuit breaker. Don’t skip this step.
- Remove the existing switch: If you have an existing switch for your outdoor lights, remove it from the wall. You may need to use a screwdriver to remove the switchplate and screws.
- Connect the wires: Connect the wires from the timer to the wires in the electrical box. Follow the instructions provided with your timer to ensure that you connect the wires correctly.
- Mount the timer: Once the wires are connected, mount the timer to the electrical box using the screws provided. Make sure that the timer is securely attached to the box.
- Test the timer: After the timer is installed, turn the power back on and test the timer to ensure that it’s working correctly. Follow the instructions provided with your timer to set the on and off times.
By following these steps, you can easily install a timer on your outdoor lights and start enjoying the benefits of automated lighting. If you’re unsure about any part of the installation process, consult a licensed electrician for assistance. These are great, tried-and-true options, the switch timers, so, don’t let the headache of the install spook you from them too much!
Smart Light Bulb Installation
Installation of smart light bulbs is the simplest of all options. All you have to do is screw in the smart bulbs, pair them to the app and you are good to start controlling the lights and setting timers from anywhere.
If you are using more advanced setups, like using the Philips Hue Hub – you’ll have to install and pair that device too. Even with the extra devices, the setup is simple. All smart bulbs and lights walk you through the initial setup and installation process, so you’ll be sure to have a streamlined setup for smart lights, faster than any other method.
4 More Places Switch Timers Can Save You Time And Money
Switch timers aren’t just useful for outdoor lighting – they can also save you time and money in other areas of your home. Here are some examples of where else you can use switch timers:
- Bathroom exhaust fan: Switch timers can be used with bathroom exhaust fans to prevent them from running for extended periods of time and sending heated or cooled air out of the house. You can set the switch timer to turn off the fan after a certain amount of time has passed, ensuring that it doesn’t run unnecessarily and waste energy.
- Room lights: Switch timers can also be used with room lights to prevent lights from being left on when no one is in the room. You can set the switch timer to turn off the lights after a certain amount of time has passed, ensuring that you don’t waste energy and money on unnecessary lighting.
- Kitchen appliances: Switch timers can also be used with kitchen appliances like coffee makers, slow cookers, and toaster ovens. You can set the switch timer to turn on the appliance at a specific time, ensuring that your food or drink is ready when you need it.
- Heating and cooling systems: Switch timers can be used with heating and cooling systems to ensure that they turn on and off at specific times. This can save you energy and money by preventing the systems from running unnecessarily when no one is home.