
WiFi is one of the simple and cost-effective ways to access the internet without wires. Knowing how to share your WiFi connection with a laptop through your iPhone is important, as most laptops lack cellular connectivity and rely on WiFi. Sharing WiFi between an iPhone and a Mac is easy as long as you set up everything correctly. Here’s a guide on How to Share WiFi With a Macbook Using Your iPhone.
How to share WiFi from your iPhone to your MacBook:
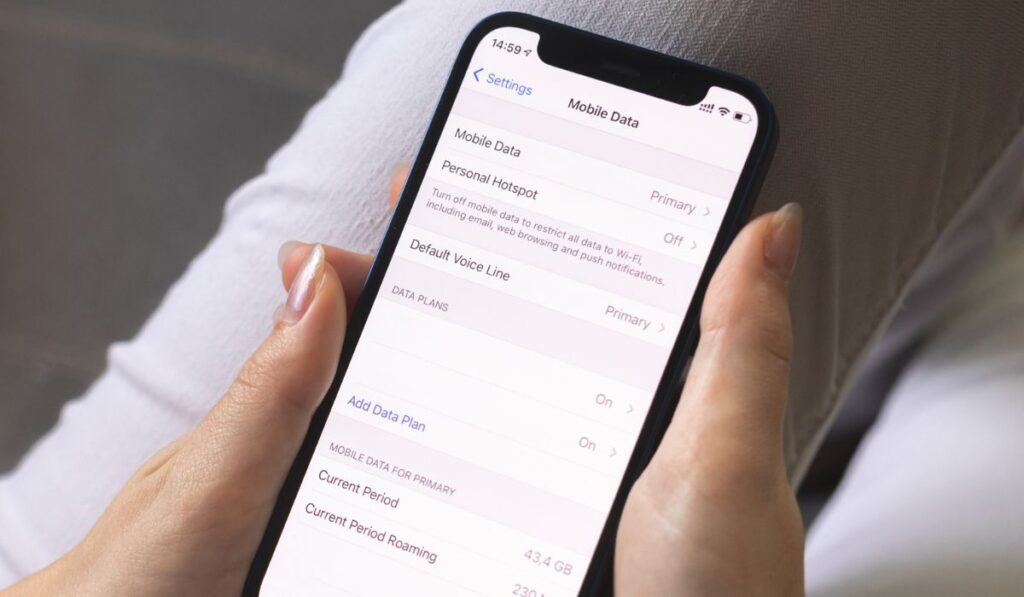
- Connect your iPhone to your WiFi network, then go to “Settings.”
- Select “Personal Hotspot” and toggle it on.
- On your Mac, go to the WiFi menu and select your iPhone.
- Your Mac should now be connected to the WiFi network through your iPhone.
Now that we have an idea of how how the basics of sharing WiFi with a MacBook using an iPhone works, let’s get into the details and find out more.
How to Share WiFi From an iPhone to a MacBook

Follow these steps to share WiFi from your iPhone to your MacBook:
- Connect your iPhone to your WiFi network, then go to “Settings.”
- Select “Personal Hotspot” and toggle it on.
- Go to the WiFi menu on your Mac and look for your iPhone’s name.
- Click on it and enter the password if prompted.
- Your Mac should now be connected to the WiFi network through your iPhone.
You can also share WiFi from your iPhone to a Mac using apps like AirDrop or SHAREit.
How to Share WiFi From an iPhone to a PC
The built-in personal hotspot feature in iPhones enables you to share your internet without needing third-party software. You can share it with these three methods:
Through Personal Hotspot
- Go to “Settings” on your iPhone, select “Personal Hotspot,” and turn it on.
- Turn on the WiFi on your laptop and click on your iPhones name.
- Enter the password if prompted to connect.
Through Bluetooth
- Go to “Settings” on your iPhone and turn on Personal Hotspot and Bluetooth.
- Turn on Bluetooth on your laptop and connect your iPhone to it.
- Navigate to the Control Panel and open “Network and Internet.”
- Select “Network and Sharing Center” and click “Change adapter settings.”
- Right-click on “Bluetooth network connection” and select “View Bluetooth network device.”
- Select your iPhone’s name and right-click on it to connect using the access point.
Through a USB Cable
- Install the latest version of iTunes on your laptop.
- Turn on the Personal Hotspot on your iPhone.
- Use a USB cable(On Amazon) to connect your iPhone to your PC.
- A pop-up message asking you whether to trust the computer will appear on your screen. Click on “Trust.”
- Search for” Device Manager” on your laptop.
- Scroll down to “Other devices” and click on “Portable devices,” then right-click and select “Properties.”
- Click on “Driver” and update the driver if your iPhone doesn’t appear in the WiFi connections list.
- Your iPhone should now appear as a wired connection in the taskbar.
How to Use Your iPhone as a Personal Hotspot
You can use your iPhone as a personal hotspot with these steps:
- Go to “Settings” and select “Cellular.”
- Select “ Set Up Personal Hotspot,” then follow the onscreen instructions.
- If you don’t see Set Up Personal Hotspot as an option, and Cellular Data is on, contact your carrier about adding Personal Hotspot to your plan.
- On your other device, turn on WiFi and connect to the Personal Hotspot you’ve set up on your iPhone.
Once you’ve set up a Personal Hotspot on your iPhone, you can change the WiFi password by going to “Settings > Personal Hotspot > WiFi Password.” To turn off Personal Hotspot, go to “Settings > Personal Hotspot,” then turn it off.
Note: If you have two SIMs in your iPhone, Personal Hotspot will use the line you currently have selected for cellular data.
How to Share WiFi From One iPhone to Another


You can share WiFi from one iPhone to another by connecting your iPhone to a WiFi network and turning on Personal Hotspot.
On the other iPhone, go to “Settings,” click on “WiFi,” and select your iPhone from the list of available networks. Enter your password if prompted, and the connection will be successful. You’ll notice a blue band at the top of your iPhone screen and the Personal Hotspot icon in the status bar of the connected iPhone.
Interestingly, you can connect both iPhones without entering a password if you’re signed in with the same Apple ID on each device, and Bluetooth and WiFi are enabled on the two devices.
Can You Share WiFi From Laptop to Laptop?
Yes, you can share WiFi from one laptop to another. To achieve this, you must connect one laptop to a WiFi network, and the other must be ready to detect and receive the connection.
The way you share the connection will depend on the laptop model. The laptop connected to the WiFi network often serves as a mobile hotspot to share the connection with other devices.
Sharing WiFi From a Windows Laptop to Another
Here’s a quick guide on how to share WiFi from laptop to laptop (Windows PC):
- Turn on the WiFi on both laptops and connect one to the WiFi network.
- On the laptop with the internet connection, open the Control Panel and go to “Network and Sharing Center.”
- Select “Change adapter settings.”
- Right-click on “WiFi and select “Properties.”
- Click on “Sharing” and check the tiny box next to “Allow other network users to connect through this computer’s internet connection.”
- Click “OK” and close the Control Panel window.
By now, the other laptop should be able to access the internet via a direct connection from your laptop. You can test it by opening the web browser and searching for something.
Sharing WiFi From Mac to Mac
For WiFi sharing from Mac to Mac, you can follow these steps:
- Enable the WiFi on both Macs and connect one to your WiFi network.
- On the Mac connected to your WiFi network, go to the Apple menu, select “Settings,” then click on “General” in the sidebar. Scroll down and click “Sharing” on the right.
- Click on “Info” next to “Internet Sharing.”
- Click the “Share your connection from” pop-up menu and choose “WiFi.”
- In the “To computers using” list, also select “WiFi” and click “WiFi Options.” Configure the internet-sharing network and click “OK.”
- The other Mac should be able to access the internet using the connection.